
This guide aims to give you the tools to setup ArcDPS for measuring your DPS performance. Arc allows you to see the damage done not only by you, but also your entire squad. It gives a plethora of customization options to allow for more accurate measuring and analysis (both in the form of logs and in the tool itself).
This deep analysis tool will allow you a faster and simpler path to improvement in an ideal Golem setup and real encounters. This comes with a sense of personal responsibility to not treat others unkindly or be obnoxious about other people’s performance when input was not requested (in short, just don’t be an asshole). Please also refer to the [MUTE]’s guild policy for how we expect people to behave with us.
Installation#
Installing ArcDPS is a rather simple task and is not the aim of this guide so we will not focus much on them. There are 3 main methods of installing ArcDPS.
- Direct Install
- GW2 Unoficial Add-On Manager
- Raidcore Nexus
Here at [MUTE], we usually recommend the Raidcore Nexus installation method.
Direct Install#
As the name of the method implies, you are directly downloading the dll file from the deltaconnected website and moving this file into the folder where Guild Wars 2 is installed. You can find the file at https://www.deltaconnected.com/arcdps/.
Once you download the file you are gonna move it to your Guild Wars 2 installation folder. It should look like the following image.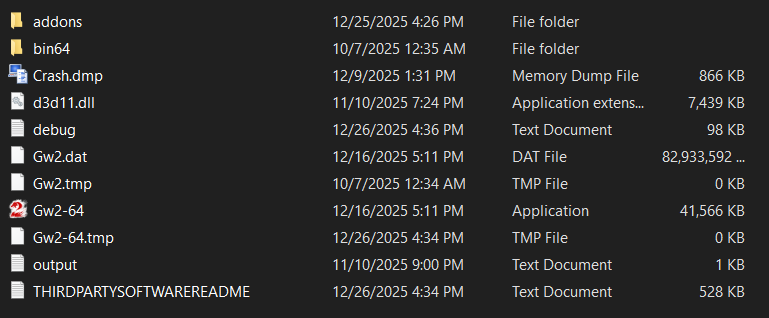
The d3d11.dll file is ArcDPS. After moving the file once you open GW2, ArcDPS will be there.
GW2 Unofficial Add-On Manager#
ArcDPS come with a plethora of extra add-ons that can improve the tool further giving it more usability. Add-ons such as boonTable allows users to read and analyze boon uptimes. Other add-ons you may find useful are: healer stats, food and utility reminder, and more. You can manually download all of these extra add-ons but keeping track of them can become a troublesome task. This is why some people use GW2 - UAOM which is a tool that streamlines the process of installing not only ArcDPS but also all the relevant extra Add-Ons that you can include.
You can find the download for the tool from GitHub. The github page has a link for the installation of the tool and all it’s applications so we will skip to the next method.
Raidcore Nexus#
And last but not least we will talk about my preferred method of installation. Raidcore Nexus much like ArcDPS is a Guild Wars 2 add-on, it manages and provides a hub for Guild Wars 2 add-ons to be hosted and it streamlines the process of getting add-ons. Additionally, makes sure that add-ons that would cause crashes during updates get disabled and auto updated.
A link to a download and setup guide for this tool can be found here.
Basic Setup#
Once we have ArcDPS installed, we are ready to launch GW2 and start the setup process for it. The tool is great out of the box but we will do some minor changes that will facilitate deeper analysis and allow us to get the most out of the tool!
However first we have to make sure Arc is properly installed, to do so we will press and hold the following keys: ALT+SHIFT+T.
A window will pop up that should look similar to the image below.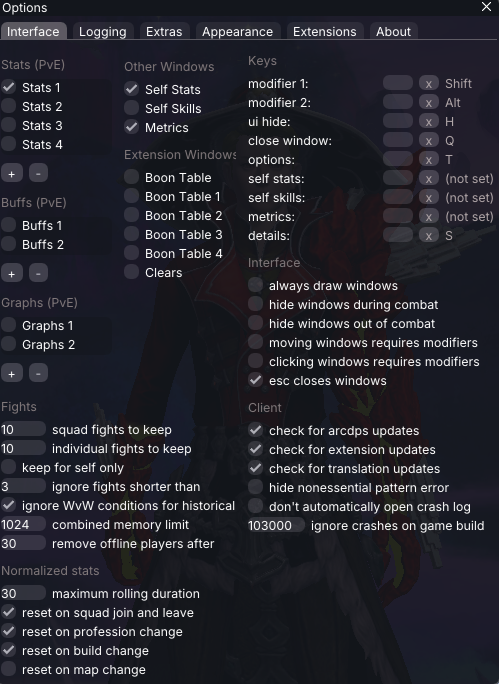
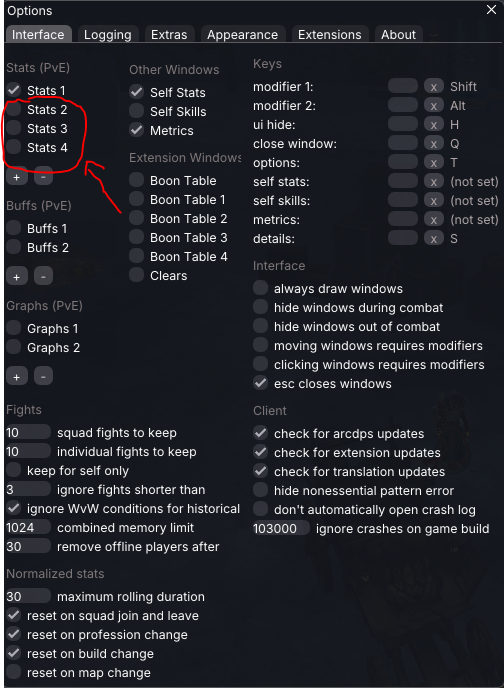
If you see the previous Window pop up after those keys are pressed then congrats! ArcDPS is ready to be used.
The first thing we will do is make sure we see the dps window. On the top left under the Stats (PvE) section we will mark the Stats 1 box. This will show us the main ArcDPS window, which will contain information about the DPS of each individual under our squad or party!
Most people use this as their main ArcDPS setup and it will work fine for most activities in the game. However we will dive just a slightly bit deeper to ensure you have the most basic tools for improvement within ArcDPS. \o/
Saving logs#
The first thing we will enable is the capability of ArcDPS to save logs. Why is this important? Well to put it simply, logs are the main tool groups and individuals use to improve DPS within the game and even use it to analyze encounters to find problems within the group that need to be fixed in order to clear harder content. Learning how to read and interpret logs is a totally different skill we will not cover in this guide. We will just focus on making sure our ArcDPS is saving logs correctly.
Enabling logs is pretty simple. By pressing ALT+SHIFT+T you can open the main Arc Window we saw earlier.
As you can see in the top of the screenshot we have a bunch of options to choose from. This guide will solely focus on the Interface and Logging options.
We will select the Logging option on the top, this will change our window to look like this: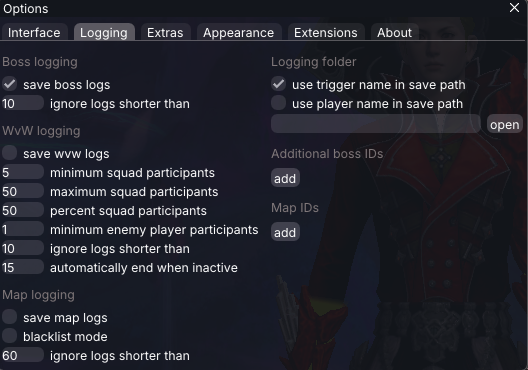
save boss logs! once that is done, in order to find out where ArcDPS is sending your logs within your computer we will press the open button on the right: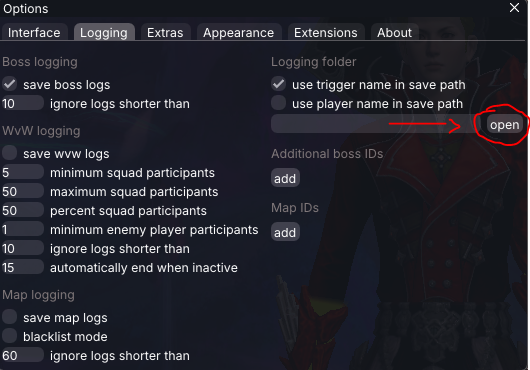
Top DPS person being single target damage#
A very common thing to happen to a lot of players is seeing themselves at the top or higher side of the DPS meter but when looking at logs they will find a mismatch. They may see that they are not as high as they should be or that they are higher than what the DPS meter was reporting during the encounter.
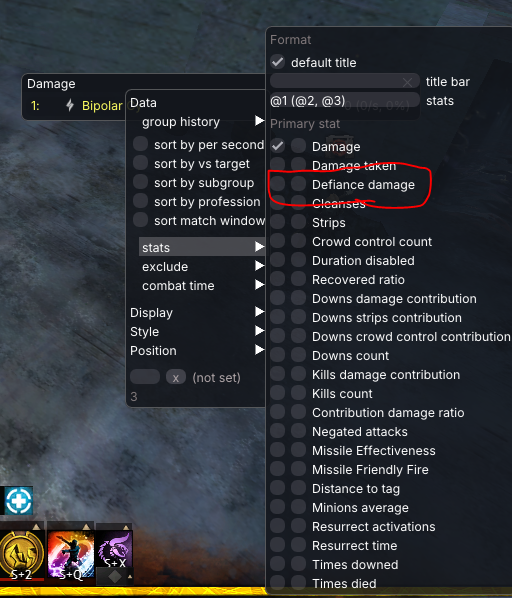
This usually happens because ArcDPS is set to report all damage done during an encounter. This means that ArcDPS will not only report the damage done to the boss, but also to every enemy hit during the encounter. A lot of that damage is actually not relevant to how fast or how much damage is actually done to the boss (with some exceptions). As such when parsing logs most, if not all, cleave damage not relevant to the boss gets ignored, making it so that there is a disparity between the logs and what the DPS meter is reporting.
To solve this we will enable two simple options in our DPS meter to make sure we have accurate readings (or as accurate as we can get them at this stage).
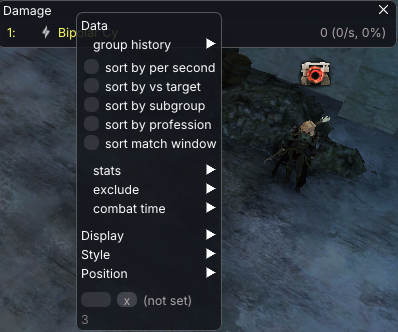
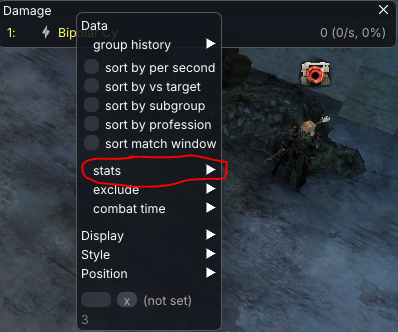
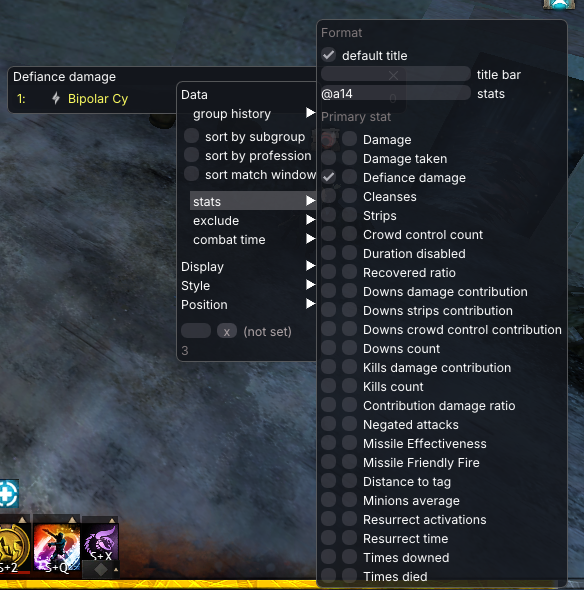
We will go to our dps meter and right click it!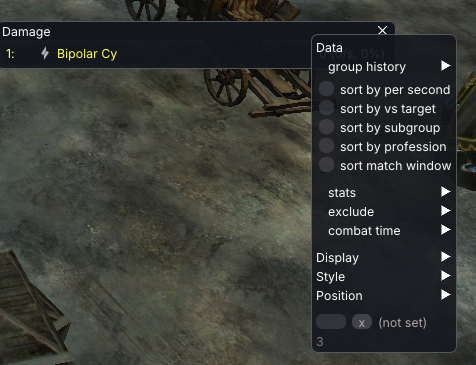

Once we enable those two options our DPS meter will be more accurate to what shows up on the log (at least position wise, we will play around with values in the advanced setup).
And such your DPS meter should look like: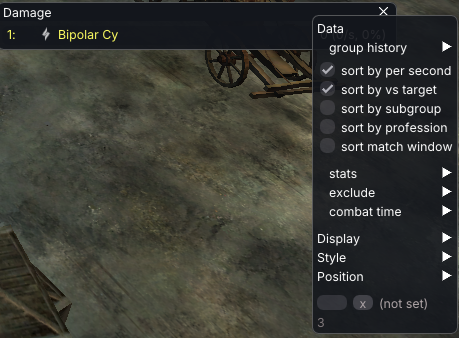
Breakbar Damage Meter#
The last change we will do for our basic setup will be a Breakbar Damage Meter. This will tell us how much CC is being done by each player in the squad/party. This will not be as impactful of a change as the other modifications we will be, but it will be a very nice tool to have in encounters with lots of breakbar phases where a large amount of CC is needed (i.e, Keep Construct, Aetherblade Hideout CM, Sabir, etc).
In order to set this up we’re going to pull up arc settings with the keys ALT+SHIFT+T like we did before. Once the window is open we will focus on this options: